Category Archives: TUTORIALS

Simple Hobo Drawstring Backpack

Standard

I’m going to be making at least 60 of these bags for a women’s event in March. I wanted to be sure my concept size would be appropriate for holding a full sized folder, Bible, water bottle and a few personal items before I made all of them so I  whipped up just one. Luckily, my prototype was perfect!

In a nutshell, I cut a long rectangle 13X36 inches. I folded the rectangle right sides together and pressed down 1/2 inch on the 13″ sides.

Then I folded it again 1 inch and pressed again. Repeated for the other 13″ side.

Now, the top part will be the casing for straps so if I was using a t-shirt I could leave the edges raw. However, this is woven cotton. So I unfolded my presses and pressed in 1/4 inch on each casing end then redid my folds so that the raw edge was hidden in the casings.

Next I stitched the casings in place. Then I stitched together the upper bag sides with my regular machine. I switched over to my serger at this point and finished the sides. After turning right side out, I stitched two dime sized circles on the bottom corners through both layers of fabric.  This was stay stitching for where I threaded through the straps in the last step. Alternately an eyelet could be used but that would raise the cost and not look as “hobo” as I wanted.  I used a seam ripper inside the circle to create a 1/4 inch gash. Then I cut two strips from cotton jersey, 2″ X 60″ each. T-shirts could have been recycled for this at a slightly lower cost but yardage was more convenient for making so many bags. Jersey doesn’t have to be finished and it very comfortable for weight bearing straps. Using a safety pin, I threaded one strap through one side of the casing and all the way around and out at the same side it was inserted. I did the same with the other strap on the other side. The last step was to pull the strap ends through the backpack gashes and tie knots to secure. Strap length is easily adjusted by trying on the backpack and pulling the straps to cinch. Then just retie the knots higher and trim the excess.

I will try to add pictures for these steps as I work on more bags in the next few weeks. 😉

Frugal Baby Gift Basket

Standard

I only had a couple of day’s warning to put together a nice gift for an expectant mom. I love baby showers and I love making gifts for babies so I felt no pressure at all making something on short notice. I spent a couple of days assessing what materials I had on hand and the time I would have to work(seems like there’s less and less of that these days).  I had such a therapeutic morning assembling this gift! With a good plan and a supportive hubby I was able to get this gift done with plenty of time to spare.

The first gift made was a tie dyed onesie. It’s supposed to be black with accordion folds but I forgot that black often comes out purplish. It’s been a long time since I’ve dyed anything! It’s a gift for a boy so I thought I’d better make it look more boyish. I quickly downloaded some clip-art and printed it on iron-on transfer paper. Adorable and gender neutral! It’s also much darker in person.

Next up was a crinkle tag toy. This one was insanely easy to whip up! I saw it somewhere on my internet search for frugal baby gifts but I can’t recall where. But basically it’s 6 bits of folded ribbon, 2 6X6 inch squares of flannel and a layer of plastic in between. It took about 8 minutes to make it and I had to fight my 11 month old to keep it for a gift. She was really loving it!

Last was the bucket to present the gift in. I had posted a tutorial for this project on my old blog but that blog is, sadly, no more. 😦 It’s pretty simple though. You cut 4 exterior and interior pieces 6.5X8.5 inches and 1 interior and exterior pieces 8.5X8.5 inches. Assemble the exterior box by sewing together the 4 exterior side pieces face-to-face on the short sides to form a bottomless box(like a box kite). Then attach the 8.5 inch square to the botom face-to-face.

Repeat steps with interior pieces.

Place right side out exterior box on flat surface and insert right-side-out interior box.

Starting an inch down from the top edge, sew in-the-ditch on all four corners.

Cut a square of cardboard to fit the bottom of your box and slip it in down one of the sides. Then cut 4 cardboard pieces to fit the sides(1/2 inch shorter than the top edge of your fabric).

When your cardboard pieces are all in you can fold in the outer and inner edges, pin and sew shut.

I’ll make a tutorial again one of these days. I wasn’t thinking about it this morning or I would have taken pictures of my work in progress. Duh!

Anyway, I added handles and a little pocket on the front to slip an index card into. That way the bucket is reusable as a nursery organizer. 😉

I added a  Baby Gap hat I picked up on clearance, tissue paper and a recycled card festooned with a recycled ribbon.

All in all this gift cost about $5 and 2.5 hours of crafting.

Reusable Fleece Swiffer Duster Tutorial

Standard

A day late and a dollar short? I promised to have this tutorial posted in June and I missed my own deadline. Sorry about that. But speaking of a dollar, you’ll be sure to save a few of those when you sew up a couple of these and stop buying the disposable duster covers.
It’s really easy to do and all you need is your empty Swiffer Duster wand, an old fleece blanket, clothing item or scraps, and needle and thread.
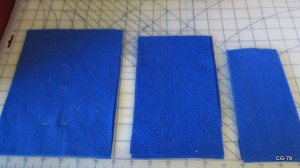
First cut 6 rectangles from fleece. You will need 2 of each: 7X9 inches, 5×8 inches, 3×7 inches.
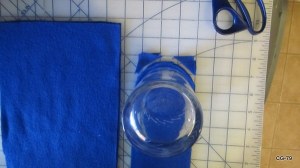
Use a drinking glass as a guide to curve the top edge of the smallest rectangles.

Stack the smaller rectangles on the medium rectangles and mimic the curve. Stack again and curve the largest rectangles.
Now rearrange the stack so that it goes small, medium, large, large, medium, small.
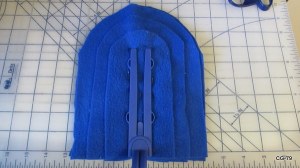
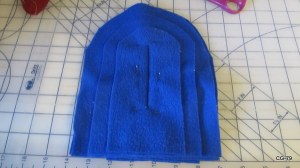
Place your empty swiffer on top of the pieces and use pins to mark the center line, the outside edges and the top as shown in the picture. *See note about the side pins further on!


Sew the center seam. Remember, it does not go to the fabric edge!


Next, sew the outer seam. I sewed 1/4 inch outside of my pins to make room for those bumps in the swiffer. ***I realize I put the pins on the narrowest part of the swiffer in earlier pictures. That’s misleading. Don’t sew on that line or you won’t be able to insert your swiffer! So pin outside the bumps or sew 1/4 inch outside the narrowest part if you pin like I did.


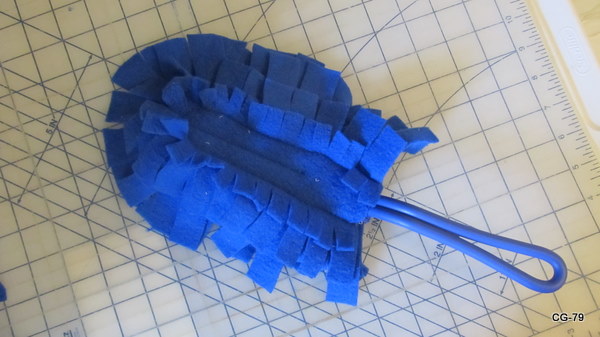
Now this is what I consider to be the tricky part. Cut the large pieces into 1/2-3/4 inch wide strips. You will need to remove a few triangle pieces around the curve. Compensate for any gaps in one large layer by alternating where you cut the strips on the other large piece.


Then cut the medium layers in 3/8-1/2 inch strips. You will need to remove triangles around the curves here too.


Lastly, cut the smallest pieces in 1/4-3/8 inch strips. I didn’t bother to remove triangles on these pieces.
Insert your swiffer and start dusting! If your swiffer cover is a little loose on the frame, use a safety pin near the handle and through both side layers of fabric to hold it on while you dust. It just so happens that mine turned out perfect the first time. 😀


And it works great! Fleece is so great at attracting dust and lint that I had to keep picking off all the little thread bits that it snagged while I was making this tutorial. I finally gave up and figured that it just demonstrates how well it works. 😛

10 minute sweatshirt garden gloves * Tutorial *

Standard

Recycle your old Winter sweatshirts into useful Spring gardening gloves. It’s super fast and easy, no pattern required!

First grab an old sweatshirt.

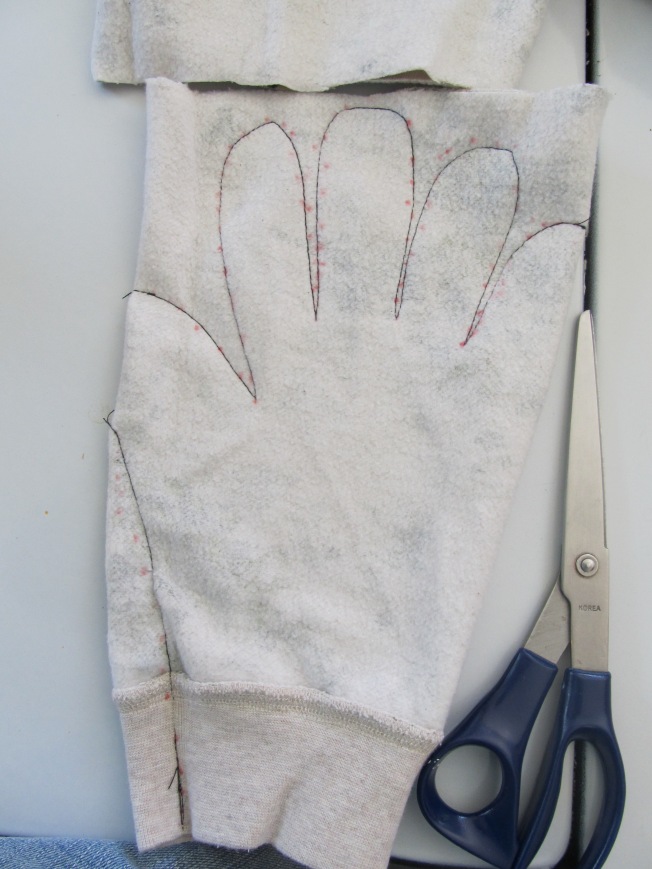
Turn it inside out and insert your hand into a sleeve. Stretch out your fingers and pin at the deepest and highest points of your hand shape. You can also use the bottom edge of your sweatshirt to make your gloves. I plan to make 3 pairs from one small sweatshirt. I just started with the sleeves.

Take out your hand and mark your glove shape with a marker/pen using your pins as guides.

Sew along your pattern line.

Trim.

On to glove #2. I used my already made glove to make a copy by tracing around my trimmed seams and sewing a bit inside  my line. You can do the pin & marker thing again if you want to though.


Turn the gloves right side out and marvel at your awesome free gloves!

These really took only 10 minutes and that included stopping to take pictures. Can’t wait to try them out this weekend in the garden.

Nut Milk Bag Tutorial

Standard

It’s absolutely insane what companies are charging for nylon mesh nut milk bags. I wasn’t about to pay $11 plus shipping for a piece of serged nylon so I rummaged in my clothes to recycle bin and came up with the perfect item for recycling, a fine mesh 100% nylon vintage negligee robe.  These can be had very cheaply at thrift stores and yard sales. Mine was free. I washed it in hot vinegar water to remove any detergent and oil residues and then began my project.

First, draft a pattern. Draw a box 14.5 inches high by 13.5 inches wide.

Mark the center line along the height. Cut out the box and fold along the center and then along the width. Unfold. Mark a curve between the side center and bottom center folds. Cut. Your pattern is ready. 🙂

Cut two pieces from your nylon. I weighted the pattern down and used my rotary cutter because nylon likes to shift.

Serge alone the top of each piece to stabilize.

Then put the pieces together and serge along the outer edges, leaving the top serged area open.

If simple is ok for you then you can call your project done right now! I wanted to add a drawstring and to strengthen the bag by french seaming.

So, turn the bag inside out and use your sewing machine to encase the serged edge inside a 1/4 inch seam.

Now fold the top serged edge over 1/4 inch and then again 3/8-1/2 inch. Sew around the top, leaving a 3/8 inch gap to  insert drawstring. This “hole” will remain so be sure you’ve back stitched at the beginning and end of your top seam.

Use a safety pin to thread a length of nylon ribbon through the casing and out the hole again. Knot.

Your bag is ready!

~~~~~~~~~~~~~~~~~~~~~~~~~~~~~~~~~~~~~~~~~~~~~~~~~~~~~~~~~~~~~~~~~~~~~~~~~~~~~

For Almond Milk:

Soak 1 cup of raw almond in water in the fridge overnight.

Drain water and put almonds in blender. Add 3 cups of water.

Blend until nuts stop rattling around.

Place open nut milk bag over a bowl and pour milk into bag.

Pull drawstring and lift over bowl. Squeeze bag gently to remove milk from pulp.

Refrigerate milk and remove nut pulp from bag. Rinse bag in warm water and air dry.

~~~~~~~~~~~~~~~~~~~~~~~~~~~~~~~~~~~~~~~~~~~~~~~~~~~~~~~~~~~~~~~~~~~~~~~~~~~~~~~~

My bag worked fantastic and the whole milk making process(even the bag rinsing)was fast and easy!

Terry Swiffer Covers Tutorial

Standard

These covers are a variation of the Fleece Swiffer Covers I posted in my tutorials section.
You will still cut your main terry piece 10 X 10.5 inches. You will also cut 2 pieces of terry 4.5 X 10 inches for an interior soaker pad.

I used a ratty old cotton terry bathrobe to make these.


Now serge along the long sides of your main piece.
The put your two soaker pieces together, fuzzy side out, and serge along all the edges to form the pad.

Now place your soaker pad centered on the wrong side(non-fuzzy) of your main piece and stitch along the length of the soaker edges to attach it to the main piece.

Now fold the serged edges of your main piece(fuzzy side in)to the center leaving a 1/2 inch gap. In the fleece tutorial you’re instructed to slightly overlap the edges but that’s because fleece has some stretch. The terry needs some give so leave a gap!
Now serge along the edges.

Turn inside out and adorn your swiffer!

Cleaning Rags from Athletic Socks Tutorial

Standard

The concept of this is really easy and a great way to recycle all those holey athletic socks your guys seem to go through.
First you need 4 holey socks. Cut off the heel and toe parts.

Then cut down the tubes where the holes are, trimming to get squares/rectangles.

You may end up with one piece that is much smaller than the others.
If you only have the four socks, trim down one of your other pieces to the same size as the smaller piece. If you have plenty of socks to work with, cut another to get a similar sized piece.

So I only had the 4 socks so I ended up with two small pieces and two medium pieces. Place 2 different sized pieces fuzzy side together and sew or serge along one side.

Repeat for other pieces. Then place them both fuzzy side together and sew or serge along the outer edge leaving a 2 inch gap for turning.

Turn and stitch closed and topstitch all around.

Now that you see the easy process I can assert that these take a mere 4 minutes to make start to finish.
Now you may ask why to do this?
#1. I used to just use the socks as is for cleaning but my hubby kept trying to put the rag socks back with his good socks.
#2. These are exceptionally soft and absorbent rags. These are as thirsty as two wash cloths for cleaning up spills.
#3. They’re free.
#4. They last longer as rags than they do as socks. I have some of these going on 4 years of use in my cleaning basket. I can’t even begin to count how many paper towels I must have saved by having these.
#5. Since these are free I feel no guilt throwing them out after a particularly yucky mess. I try to grab the oldest rag in the stack for those messes.

Fleece Swiffer Covers Tutorial

Standard

Before I start the tutorial I just wanna do a quick list of the other sewing projects I’ve been working on this month. They’re too boring for pictures but I’m recycling lots of stuff from my stash.

I made 18 double layer flannel cleaning cloths that fit on a Swiffer or can be used as is for dustrags. The flannel came from the top portions of adult pj pants that I’d cut down for my son and from a body billow sized pillowcase.

I shortened several pairs of my son’s cargo pants into shorts for the summer since his waist size is unchanged.

And I recovered my 11 year old compact ironing board using an old pillowcase and some leftover cotton quilt batting.

Ok, on to the tutorial. It took me just 4 minutes to make each of these so it’s a really easy project!

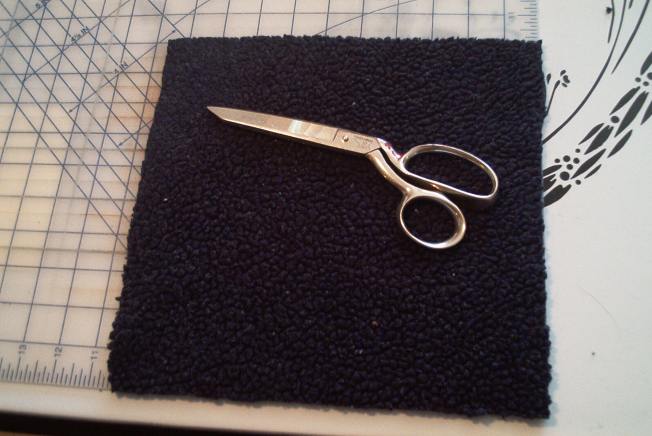
First select a fleece top that you wish to recycle and prep it by cutting it up into pieces at the seams. I used a nubbly textured pullover style, men’s large. Cut ‘fabric’ into 10X10.5 inch squares. DO NOT cut on the bias.

im002941

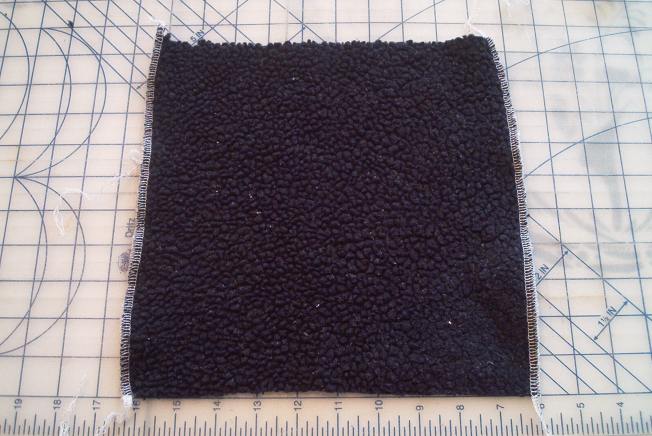
Serge the 10 inch side edges. It’s ok to ‘shave’ the edge by 1/8 inch while serging.

im002942

Now fold the serged edges in to the center overlapping seams, wrong side out. Pin along center.

im002943

My photo editor isn’t working right now so imagine these two images rotated, ok? 🙂

Now serge along the open ends(the folded 10.5 inch sides). You can shave 1/8-1/4 of an inch off while you serge since you need to be certain that the back and front flaps are completely joined. I didn’t bother adjusting my differential feed so my seams curved a little. I was in a hurry and these covers are just for cleaning after all.

im002944

Remove pins, turn inside out and adorn your swiffer!

im002945

I got 10 covers from one top. I’ve tested them out and they work great for getting up all those dust bunnies and they clean well in a delicates bag in the washer. I air dried them so I can’t comment on holding up in the dryer. Enjoy!