A day late and a dollar short? I promised to have this tutorial posted in June and I missed my own deadline. Sorry about that. But speaking of a dollar, you’ll be sure to save a few of those when you sew up a couple of these and stop buying the disposable duster covers.
It’s really easy to do and all you need is your empty Swiffer Duster wand, an old fleece blanket, clothing item or scraps, and needle and thread.
First cut 6 rectangles from fleece. You will need 2 of each: 7X9 inches, 5×8 inches, 3×7 inches.
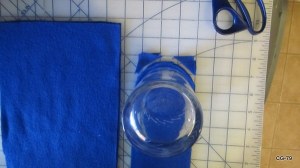
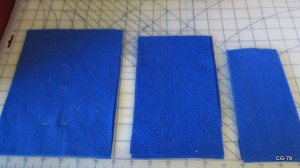 Use a drinking glass as a guide to curve the top edge of the smallest rectangles.
Stack the smaller rectangles on the medium rectangles and mimic the curve. Stack again and curve the largest rectangles.
 Now rearrange the stack so that it goes small, medium, large, large, medium, small.
Place your empty swiffer on top of the pieces and use pins to mark the center line, the outside edges and the top as shown in the picture. *See note about the side pins further on!
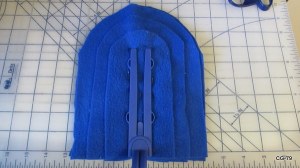
Sew the center seam. Remember, it does not go to the fabric edge!
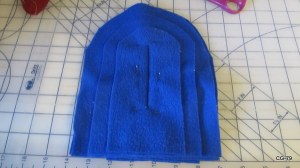
Next, sew the outer seam. I sewed 1/4 inch outside of my pins to make room for those bumps in the swiffer. ***I realize I put the pins on the narrowest part of the swiffer in earlier pictures. That’s misleading. Don’t sew on that line or you won’t be able to insert your swiffer! So pin outside the bumps or sew 1/4 inch outside the narrowest part if you pin like I did.

Now this is what I consider to be the tricky part. Cut the large pieces into 1/2-3/4 inch wide strips. You will need to remove a few triangle pieces around the curve. Compensate for any gaps in one large layer by alternating where you cut the strips on the other large piece.

Then cut the medium layers in 3/8-1/2 inch strips. You will need to remove triangles around the curves here too.

Lastly, cut the smallest pieces in 1/4-3/8 inch strips. I didn’t bother to remove triangles on these pieces.
Insert your swiffer and start dusting! If your swiffer cover is a little loose on the frame, use a safety pin near the handle and through both side layers of fabric to hold it on while you dust. It just so happens that mine turned out perfect the first time. 😀
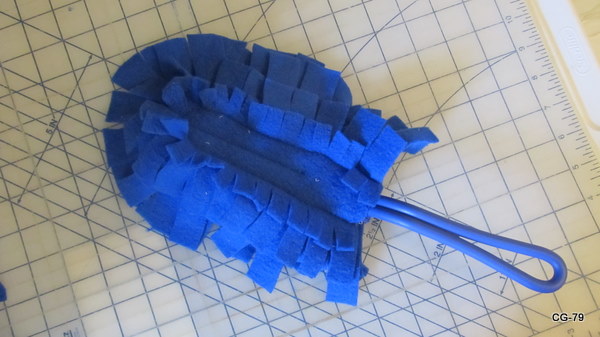
And it works great! Fleece is so great at attracting dust and lint that I had to keep picking off all the little thread bits that it snagged while I was making this tutorial. I finally gave up and figured that it just demonstrates how well it works. 😛
I keep forgetting these at the store because I hate to spend the money on something so disposable. Thank you. I will be making these.
Hi, I was searching for a tutorial/pattern for a reusable Swiffer duster and came upon several sites. I made one using a very popular tutorial, but after having completed it, I wasn’t really happy with the result, so I kept looking. I finally found your tutorial and I have to say, it’s MUCH better! I will make more of these using your instructions. Thanks!!