Category Archives: Made from Clothes

Pokemon Toys: Ash’s Hat, Pokeballs and Rattata

Standard

Here’s a little something I made for my daughter’s birthday in December:

IMG_2517

My 8 year old absolutely loves Pokemon! Now she can really play trainer with an Ash Ketchum hat, zippered Pokeballs and a Rattata. She has other Pokemon toys to play with as well but this and a tiny Victini from Hong Kong are the only two that will fit in the balls. She’s satisfied with that. 😉

The hat was simply a Goodwill buy and it was actually new with tags still on for $2. I used some cheap fleece to cut a semi-circle for the front and hand-sewed it on. The C was just freestyle and very easy to do and also hand-stitched.

The Pokeballs were simple to figure out since I’d made fabric toy balls in the past. These however were lined and needed to have a zipper so that a small Pokemon toy could fit inside. I used two salvaged zippers from clothing items and cheap fleece from Walmart. As you can see, the button accents are different on the two balls because I wasn’t satisfied with how the zig-zag stitched edge of the first turned out. The black wasn’t bold enough for me so I made the second button with a black fleece backing.

Rattata was something my daughter has been asking for for two years. As far as I know, there has never been a plush Rattata toy manufactured so I resorted to altering an online pattern(found here:http://www.allcrafts.net/crochetsewingcrafts.htm?url=sewingstars.com/mousepattern.htm   )to make this one. Alterations to the pattern included enlarging the ears(which I did make too big really), adding little felt claws and whiskers and freestyling the eyes to more closely resemble the Pokemon. It isn’t a fantastic facsimile but my daughter knew exactly who it was and was thrilled. That’s good enough for me. 🙂

Sweatshirt slippers

Standard

I needed a new pair of slippers super fast so I decided not to dig out my Mary Jane slipper pattern but instead, use a simpler, elastic style. Prudent Baby has some great directions on how to put your slippers together.

I used an old sweatshirt for mine and used plain sweatshirt for all the pieces, even the “batting”.  The bottoms will probably wear out pretty fast because of that but I wanted something especially snuggly. 😉

These can be made for just the cost of your thread and two pieces of elastic(about $.15)as well as about 30 minutes of time.


Finished Diapers

Standard

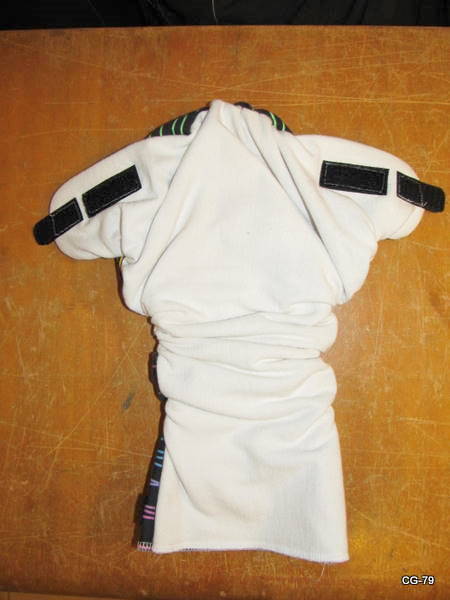
Just some shots of the finished diapers for my sister’s baby. 😉

I kinda forgot to photograph some of the large ones but they were just plain blues and browns. I still owe her the covers and I’ll be working on those today.  🙂

100 t-shirts into cloth diapers

Standard

How’s that for a title? I was going to call this “The super big project I’ve been working on” but it just wasn’t as catchy. 😉

My sister is having her first baby and informed me that she wanted to use cloth diapers. Yay! So I promised to make them for her as the baby’s gift.

Well, I decided to make 18 smalls(7-11lbs), 18 mediums(10-22lbs), 4 covers, and 36 cloth wipes. Each diaper required 3 cotton t-shirts. I needed 9 t-shirts for the wipes. So that’s over 100 tees needed. Luckily I know a church thrift that sells them for $.10-15 each. It’s a significant investment of time finding the tees, since there are just piles of clothes to go through, but I enjoy treasure hunting. 😀

So the last few weeks I’ve cutting all the pieces needed for this project. Each diaper has 4 pieces. The soakers for each diaper need 8 pieces. Wipes are 2 pieces each. All in all I needed about 500 pieces cut. They’re almost  all cut out now(just a dozen inserts left) and I’ve have started sewing.

I need to finish by Thanksgiving.

Work in progress:

Frugal Baby Gift Basket

Standard

I only had a couple of day’s warning to put together a nice gift for an expectant mom. I love baby showers and I love making gifts for babies so I felt no pressure at all making something on short notice. I spent a couple of days assessing what materials I had on hand and the time I would have to work(seems like there’s less and less of that these days).  I had such a therapeutic morning assembling this gift! With a good plan and a supportive hubby I was able to get this gift done with plenty of time to spare.

The first gift made was a tie dyed onesie. It’s supposed to be black with accordion folds but I forgot that black often comes out purplish. It’s been a long time since I’ve dyed anything! It’s a gift for a boy so I thought I’d better make it look more boyish. I quickly downloaded some clip-art and printed it on iron-on transfer paper. Adorable and gender neutral! It’s also much darker in person.

Next up was a crinkle tag toy. This one was insanely easy to whip up! I saw it somewhere on my internet search for frugal baby gifts but I can’t recall where. But basically it’s 6 bits of folded ribbon, 2 6X6 inch squares of flannel and a layer of plastic in between. It took about 8 minutes to make it and I had to fight my 11 month old to keep it for a gift. She was really loving it!

Last was the bucket to present the gift in. I had posted a tutorial for this project on my old blog but that blog is, sadly, no more. 😦 It’s pretty simple though. You cut 4 exterior and interior pieces 6.5X8.5 inches and 1 interior and exterior pieces 8.5X8.5 inches. Assemble the exterior box by sewing together the 4 exterior side pieces face-to-face on the short sides to form a bottomless box(like a box kite). Then attach the 8.5 inch square to the botom face-to-face.

Repeat steps with interior pieces.

Place right side out exterior box on flat surface and insert right-side-out interior box.

Starting an inch down from the top edge, sew in-the-ditch on all four corners.

Cut a square of cardboard to fit the bottom of your box and slip it in down one of the sides. Then cut 4 cardboard pieces to fit the sides(1/2 inch shorter than the top edge of your fabric).

When your cardboard pieces are all in you can fold in the outer and inner edges, pin and sew shut.

I’ll make a tutorial again one of these days. I wasn’t thinking about it this morning or I would have taken pictures of my work in progress. Duh!

Anyway, I added handles and a little pocket on the front to slip an index card into. That way the bucket is reusable as a nursery organizer. 😉

I added a  Baby Gap hat I picked up on clearance, tissue paper and a recycled card festooned with a recycled ribbon.

All in all this gift cost about $5 and 2.5 hours of crafting.

Reusable Fleece Swiffer Duster Tutorial

Standard

A day late and a dollar short? I promised to have this tutorial posted in June and I missed my own deadline. Sorry about that. But speaking of a dollar, you’ll be sure to save a few of those when you sew up a couple of these and stop buying the disposable duster covers.
It’s really easy to do and all you need is your empty Swiffer Duster wand, an old fleece blanket, clothing item or scraps, and needle and thread.
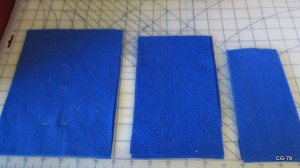
First cut 6 rectangles from fleece. You will need 2 of each: 7X9 inches, 5×8 inches, 3×7 inches.
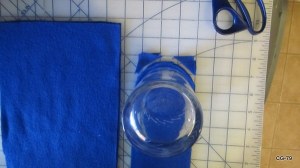
Use a drinking glass as a guide to curve the top edge of the smallest rectangles.

Stack the smaller rectangles on the medium rectangles and mimic the curve. Stack again and curve the largest rectangles.
Now rearrange the stack so that it goes small, medium, large, large, medium, small.
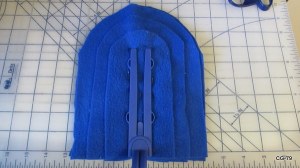
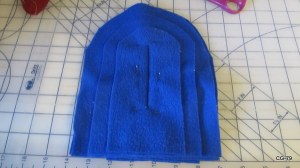
Place your empty swiffer on top of the pieces and use pins to mark the center line, the outside edges and the top as shown in the picture. *See note about the side pins further on!


Sew the center seam. Remember, it does not go to the fabric edge!


Next, sew the outer seam. I sewed 1/4 inch outside of my pins to make room for those bumps in the swiffer. ***I realize I put the pins on the narrowest part of the swiffer in earlier pictures. That’s misleading. Don’t sew on that line or you won’t be able to insert your swiffer! So pin outside the bumps or sew 1/4 inch outside the narrowest part if you pin like I did.


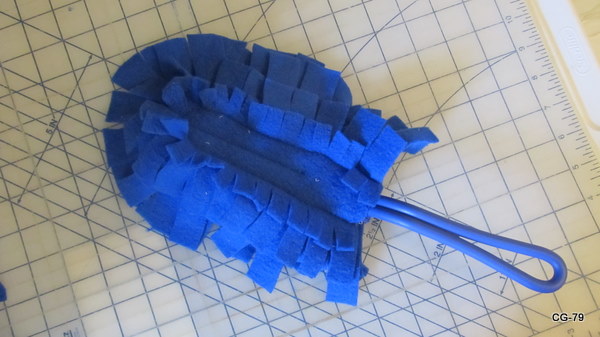
Now this is what I consider to be the tricky part. Cut the large pieces into 1/2-3/4 inch wide strips. You will need to remove a few triangle pieces around the curve. Compensate for any gaps in one large layer by alternating where you cut the strips on the other large piece.


Then cut the medium layers in 3/8-1/2 inch strips. You will need to remove triangles around the curves here too.


Lastly, cut the smallest pieces in 1/4-3/8 inch strips. I didn’t bother to remove triangles on these pieces.
Insert your swiffer and start dusting! If your swiffer cover is a little loose on the frame, use a safety pin near the handle and through both side layers of fabric to hold it on while you dust. It just so happens that mine turned out perfect the first time. 😀


And it works great! Fleece is so great at attracting dust and lint that I had to keep picking off all the little thread bits that it snagged while I was making this tutorial. I finally gave up and figured that it just demonstrates how well it works. 😛

10 minute sweatshirt garden gloves * Tutorial *

Standard

Recycle your old Winter sweatshirts into useful Spring gardening gloves. It’s super fast and easy, no pattern required!

First grab an old sweatshirt.

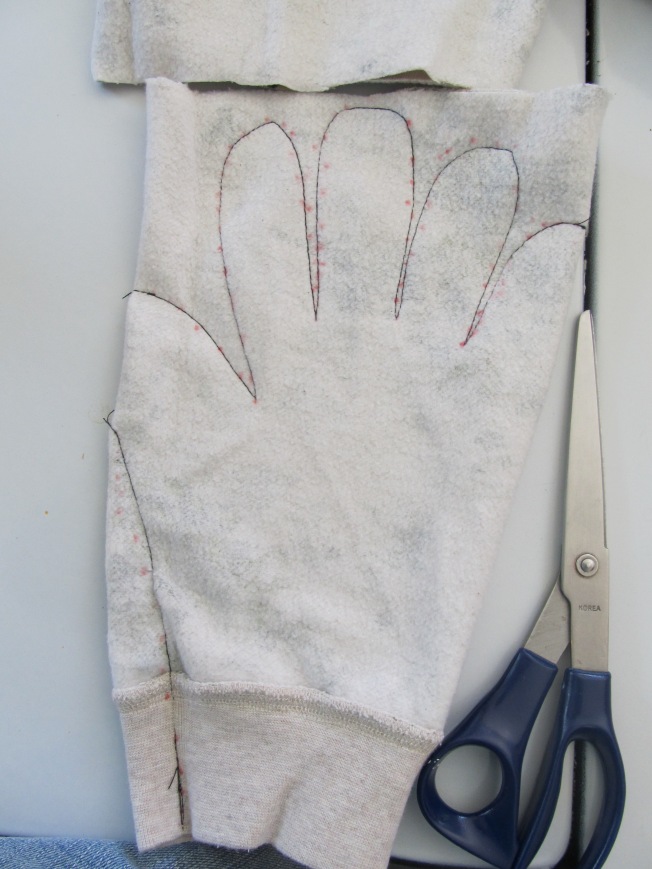
Turn it inside out and insert your hand into a sleeve. Stretch out your fingers and pin at the deepest and highest points of your hand shape. You can also use the bottom edge of your sweatshirt to make your gloves. I plan to make 3 pairs from one small sweatshirt. I just started with the sleeves.

Take out your hand and mark your glove shape with a marker/pen using your pins as guides.

Sew along your pattern line.

Trim.

On to glove #2. I used my already made glove to make a copy by tracing around my trimmed seams and sewing a bit inside  my line. You can do the pin & marker thing again if you want to though.


Turn the gloves right side out and marvel at your awesome free gloves!

These really took only 10 minutes and that included stopping to take pictures. Can’t wait to try them out this weekend in the garden.

Sweater & Leather Baby Boots

Standard

I made these elastic backed boots for a friend. Hopefully they stay on better that the prototype pair I made for my baby. I didn’t put elastic in those and she kicks them right off.
Anyway, I made these out of an old leather dress and sweater. I made a pattern by examining footie pj’s and copying the contoured pieces as best as I could.

Gift bag or purse from a sweater

Standard

This is an easy project for a damaged, outdated or too small sweater. Just turn it inside out and sew a straight line under the arms. Cut above it and zig-zag the edge for more durability. Add straps and you’re done! I used an old kid’s belt for my straps.

More homemade fitted diapers from t-shirts

Standard

I used the Fern & Faerie pattern again to make some medium sized diapers. My little one grew out of the smalls in 4 weeks. I guess then that smalls fit 8-12lbs. I think the smalls would have fit longer if the side flaps were larger. So I enlarged them for more waist room when making the mediums. I also skipped the top stitching. So far I don’t see it affecting functionality.

It took 22 cotton knit clothing items to make 7 diapers and 14 inserts. Notions cost $2.50.